Setting Up a Minecraft Server on Raspberry Pi
Setting Up a Minecraft Server on Raspberry Pi
- General Steps: Install the runtime environment –> Install the server panel –> Upload the server files –> Configure –> Start the server
Preparation Materials
Raspberry Pi 4B board
Heat sink (passive cooling is recommended)
Raspberry Pi power supply (Type-C is fine, official recommended)
Ethernet cable (wired connection is recommended, as wireless networks are unstable for hosting)
Card reader
High-speed storage card (32GB or more)
A computer
Software:
Xshell
Win32 Disk Imager
Raspberry Pi official system image
Installing the Server Panel
Installing Java Environment
Update System Sources
1 | sudo apt-get update |
Install JRE
Official System
The latest official system already includes the Java environment; it is recommended to re-flash the system.
Use the following command to install the Java environment:
1 | sudo apt-get install default-jre |
Verify Installation
Use the following command:
1 | java --version |
If you see the version of Java instead of “command not found,” the installation was successful.
Install the Panel
It is recommended to use MCSM.
Install Node.js
1 | wget https://nodejs.org/dist/v16.13.2/node-v16.13.2-linux-armv7l.tar.xz # Download Node.js installation package |
Restart Raspberry Pi
After restarting, use
node -vandnpm -vto check if Node.js is installed successfully.
Main Panel Installation, Startup, and Login
1 | cd /opt/ |
- Currently, MCSM has been updated to version 9.x, which does not support Raspberry Pi. Use the following command for installation:
1 | git clone -b v8.7.0 https://github.com/MCSManager/MCSManager.git |

Open your browser (Google Chrome is recommended) and enter http://your_fixed_IP_of_Raspberry_Pi:23333 in the address bar to access the panel.
- Default Username: master
- Default Password: 123456
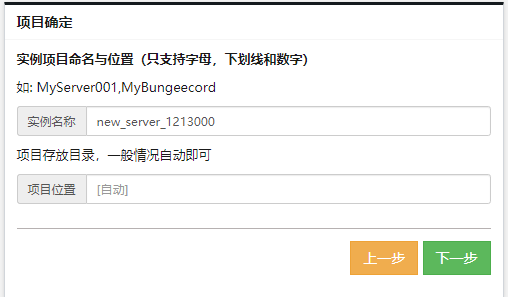
- After logging in, click “Server Management” –> “Create New Instance” –> “Bootstrap Creation.”
- You can modify the instance name; the project location can be left as default. Click “Next.”
- When you see the “Upload Server” text, click the “Select Upload File” button to upload your server files (Spigot, Bukkit, Bungeecord, Paper, etc.).

- After uploading, click “Next.”
- When you see “Creating,” you can leave the memory parameters and other settings as default for beginners (especially memory settings); you can look up parameters you are interested in.
- After completing, click “Confirm and Create.” You will return to the “Server Management” interface.
- Click on the server instance you just created, then click on the Server.Properties file under Configuration to make the necessary changes, and click “Update Configuration” when done.
- Click on “Start Server” on the left, and wait a moment.
- Open Minecraft, click on Multiplayer, click “Add Server,” and enter
your_fixed_IP_of_Raspberry_Pi:25565to join the game. - The MCSManager server management panel has a command console, which serves as the command input for the server. You can input server commands here.
Installing Intranet Penetration
If your server has a public IP, you can skip this step.
Install Ngrok
1 | wget https://bin.equinox.io/c/4VmDzA7iaHb/ngrok-stable-linux-arm64.tgz |
Open https://ngrok.com/, click “Sign Up” in the top right corner, and register using your email.
After registering and logging in, open https://dashboard.ngrok.com/login.
You will see “Connect Your Account” under the second step with “ngrok authtoken your_token.” Copy it.
In the terminal, enter sudo ngrok authtoken your_token.
Your account will be logged in.
In the terminal, enter ngrok tcp 25565.
Find the “Forwarding” section; to the right, you will see tcp://?.tcp.ngrok.io:? -> localhost:25565 (the numbers next to the ? are random).
tcp://?.tcp.ngrok.io:? is your public address.
Send tcp://?.tcp.ngrok.io:? to your friends!
In the future, when starting the server, run:
1 | cd /opt/MCSManager/ |
In the terminal, create a new link:
1 | ngrok tcp 25565 |
Then you can happily play Minecraft with your friends using Raspberry Pi!
Note:
Ngrok and the MCSManager panel must be running simultaneously; you can copy the tab in Xshell by right-clicking.
The Ngrok domain changes every time; you need to send it to your friends every time you start the server.
Both Ngrok and the MCSManager panel can be exited by pressing Ctrl+C.
If an error appears while running Ngrok, stating that it cannot execute the binary file,
you will need to switch to a 64-bit kernel.
1 | sudo nano /boot/config.txt |
Add the following line at the end of the file:
1 | arm_64bit=1 |
Press Ctrl+X, then press Y to save and exit, and restart Raspberry Pi:
1 | sudo reboot |
 wechat
 alipay