
Installing Network Card Drivers on Ubuntu
Installing Network Card Drivers on Ubuntu
Preparations
Hardware:
- A USB drive
- An Ethernet cable
Software:
makegcc
Installing the Software
Installing with an Ethernet Cable
Before compiling the drivers, you need to install make and gcc:
1 | sudo apt-get update |
After running these commands, gcc, g++, and make will be installed. The build-essential package includes a complete set of tools such as gcc, libc, and more.
Offline Installation
- Check the version of
make, then search for it in your browser: ftp://ftp.gnu.org/gnu/make/ to access the download page. - Navigate to the directory where you want to store the files:
cd /home/tool - Download the installation package:
wget http://ftp.gnu.org/gnu/make/make-3.81.tar.gz - Extract the tarball:
tar -zvxf make-3.81.tar.gz - Navigate to the extracted directory:
cd make-3.81 - Configure
makefor your system:
./configure --prefix=/usr/local/make-3.81 - Compile the source:
make - Install
make:
sudo make install - The
sudocommand is required here because this step moves the compiled version ofmake 3.81to the/usr/local/make-3.81directory, which only the root user has permission to write to. - Verify the installation:
make -v
If it shows GNU Make 3.81, the installation was successful.
Installing the Driver
Step 1: Identify the Required Driver for Your Device
After connecting your wireless network card, use the command lsusb -tv to check device information:
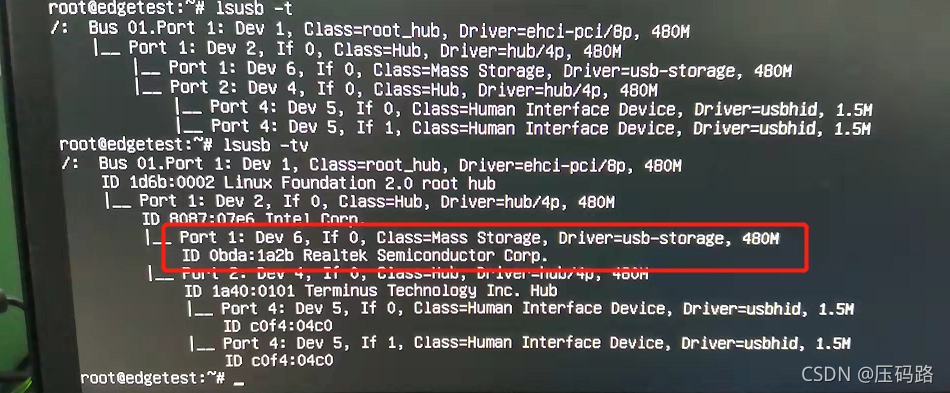
Here, 0bda:1a2b is the manufacturer ID:product ID, and Driver=usb-storage indicates the device has been recognized as a USB storage device. This happens because most driverless network cards store Windows drivers, so by default, they are recognized as USB drives, which are useless in Linux. We need to switch the device mode to recognize it as a network card. Run the following command to switch modes:
1 | usb_modeswitch -KW 0bda -p 1a2b |
Then run lsusb -tv again to check the device information:
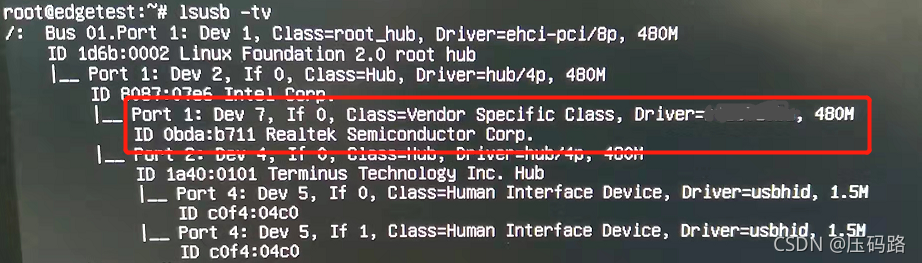
At this point, the ID has changed from 0bda:1a2b to 0bda:b711, and the Driver= section is empty. I intentionally blanked out the details, as they will appear only after the driver is installed.
Next, go to www.linux-usb.org/usb.ids to find the chipset model based on the new ID (b711).
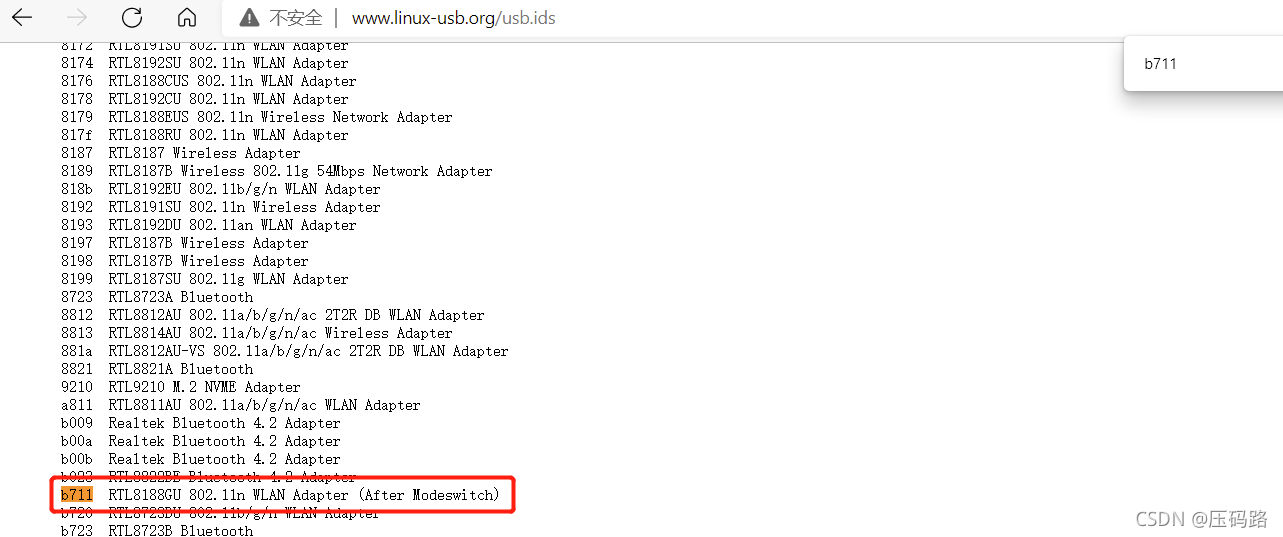
As shown, the chipset is RTL8188GU, so we need to search for a third-party driver on GitHub for this chipset.
Step 2: Compile and Install the Driver
Go to https://github.com/McMCCRU/rtl8188gu and download the ZIP of the master branch to your local machine. Extract the files and navigate to the directory, then run make and make install:
1 | make |
After completing these steps, you should see a new file 8188gu.ko in /lib/modules/5.4.0-90-generic/kernel/drivers/net/wireless/.

The directory name 5.4.0-90-generic corresponds to the kernel version of your system, which may vary. You can check your version by running:
1 | uname -a |

Next, load the newly installed driver module:
1 | modprobe 8188gu |
After this, run lsusb -tv again, and you’ll see that the Driver= section is now populated. Though it might not display rtl8188gu, this doesn’t affect functionality.
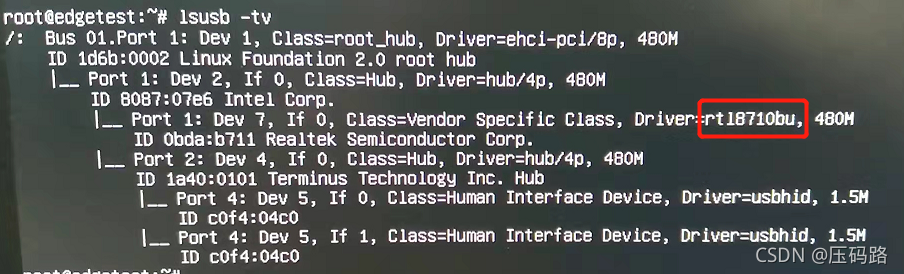
From now on, the network card will be automatically recognized whenever it’s plugged in or after rebooting.
Final Note
One more thing to note: if your system has automatic kernel updates enabled (which it typically does), the driver might stop working after a kernel update. This is because the driver was generated for the specific kernel version in use at the time of compilation, so you’ll need to recompile the driver for the new kernel.
 wechat
 alipay